Toolwire Student Desktop Help
Toolwire is a hands-on experiential learning company. We provide access to real hardware and software over the Internet so anyone, anywhere, anytime, can learn how to use technology. Our custom labs and platform environment provide real world experience for students around the world.
Desktop Environments are Toolwire hosted computers with course specific software. These known good environments provide you with an actual hands-on "sandbox" where you have the freedom to learn without the fear of breaking anything. It's important to note that all files you create should be saved to your online storage directories for retrieval later. Any changes you make to your desktop operating system, or files you leave in it, will be lost when you exit.
To transfer files to or from your online storage, click the File Transfer button on the top navigation bar as shown below:

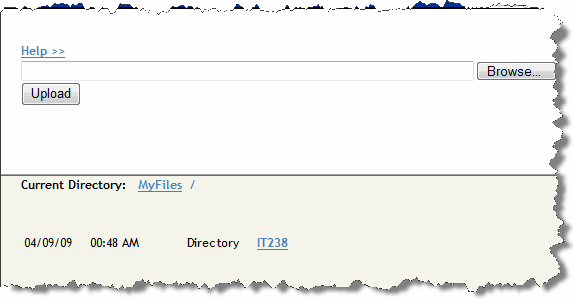
The upper half of the File Transfer window contains an upload form, while the lower half contains your online storage directory, My Files, as shown below:

To Download: Clicking on directory links in the download area will navigate to those directories. Clicking on file links will open a standard File Download box where you can choose to Open or Save the file to your local computer.
To Upload: Click the Browse button to open the Choose File dialog box. Navigate to the file's location on your local computer, select the file and click Open. Click the Upload button to upload the file. Note, the file will be uploaded to the Current Directory shown in the lower half of the window.
Watch the tutorial

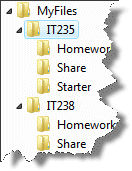
Always save your work in your Course directory, under MyFiles, before exiting Toolwire (Never save files directly into your Homework directory since this directory is for final grading only). An example of a typical directory tree is shown below:

Watch the tutorial

Never work directly in your Homework directory, or save files directly to this directory. Please only copy final, ready-to-be-graded files, to your Homework directory. The Homework directory is Read-Only, so you cannot change or delete files in it--you can only add files to it.
Files: Follow the lab guide, performing the hands-on work, then copy your final files that you wish to be graded into the Homework directory. Each Course has it's own Homework directory as shown below:

Screenshots: If the lab has no file based deliverable, for example an operating system configuration lab, the lab guide will instruct you when to take a screenshot using Toolwire's built-in screenshot utility. This utility automatically names and saves screenshots to your Course directory. When you are satisfied with your work, you can drag and drop the images to your Homework directory.
Watch the tutorial

Within each Course directory, there is a Share directory accessible by all students within your specific class. It is a Read-Write directory, so be careful not to delete or edit other classmates' files they are sharing!
Watch the tutorial

Quotas
My Files (U:): The maximum size of this directory is 100MB.
Homework: There is no size limit, but the directory will not accept files larger than 30MB.
Share: There is no size limit, but the directory will not accept files larger than 30MB.
Website: If your course has a website component, this quota falls under the My Files 100MB limit.
Zipping/Deleting Files
90 days after the course start date, the Course directories (excluding the course Share, Homework & Starter directories) are zipped up and placed in your My Files directory. The course Share directory is deleted at that time. The Homework directories are retained for 9 months.
Final Deletion
Instructor & Student directories will be deleted 1 year from their last login date to Toolwire.
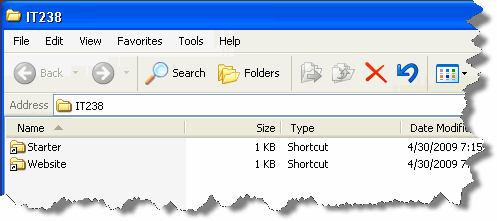
Some courses may require building or editing websites. For these courses, you'll see a Website directory under the Course directory. Copying web-based files (.html, .jsp, etc) to this directory will make them accessible on the World Wide Web. Note there is a default file named index.jsp in the Website directory.

Clicking the MyWebsite button on the top navigation bar, as shown below,

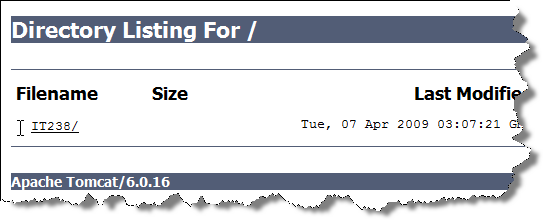
will open a web browser window showing your course directory link as shown below:

Clicking on the course link opens the Website directory for that course. By default, this will open the Welcome page, index.jsp as shown below:

This page is fully customizable, as are any subdirectories you wish to add. Your website URL is your Toolwire PublicID plus your Course #: http://web.toolwire.com/YourPublicID/Course#/ and can be found in the address bar as shown below:

Watch the tutorial

There is a time limit for completing Toolwire labs. It is shown in the upper right corner of the navigation bar. In some cases, you can extend the time allotted. In those cases, a warning dialog box will appear and ask if you would like to extend your time before it runs out. When the countdown clock shows you have 10 minutes remaining a, Save Your Files reminder pops up and you will be given the option to "extend" your session by 30 minutes.
Sometimes the Internet is not as stable as we would all like and your connection may get dropped. When this happens you'll see a white screen where your Desktop was seconds before. Quickly click the Reconnect button when this happens and in most cases your session will be retrieved.

Watch time limit tutorial

Watch reconnect tutorial

© Copyright 2010 Toolwire, Inc.


